Indiana University Libraries Book Repair Manual
Portfolio-type Enclosure
Treatment Criteria:
- This enclosure is normally used for large books that are not of great thickness and which are unsuitable for rebinding. Atlases are often candidates, as are oversize but thin brittle books.
- We will be constructing a four-flap inner enclosure. The inner enclosure can vary from the example given, but the structure of the outer enclosure shown will accommodate any of a number of variously configured inner enclosures.
- An outer enclosure of cloth-covered binders board is demonstrated, though it may be of bare grey/white board with a buckram spine, like the wrapper-type enclosure shown elsewhere in this manual. This variety is limited to hardcover books, as the total is too flimsy if the gray/white board outer enclosure is used for large, thin softcover materials.
- One variation on this enclosure is the use of ties. Instructions specific to this accessory are given at the end of the tutorial, and the point at which the ties would be installed is cited in the text.
Tools Needed: |
Materials Needed: |
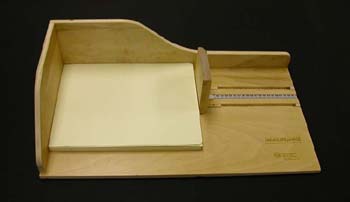
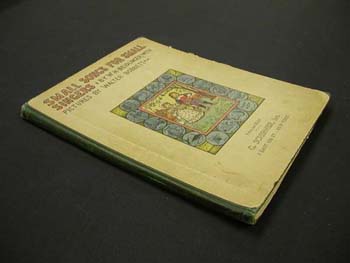 | Our subject is a large but thin brittle book. It is too thin for a phase box or corrugated clamshell box, and it is large enough that we do not want to put it in a standard wrapper-type enclosure. It is just the type of book for a portfolio-type enclosure. |
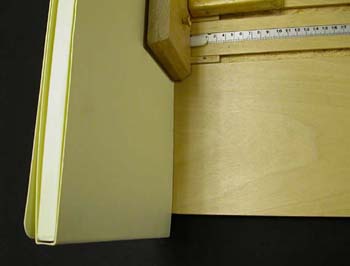
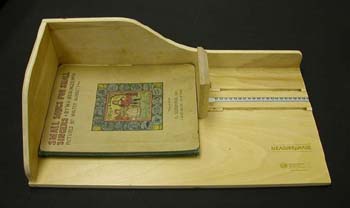 | Work begins by measuring the book in the MEASUREpHASE. First, the length measurement is taken, |
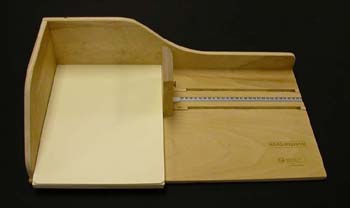
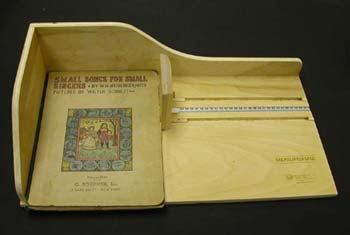 | then the width, |
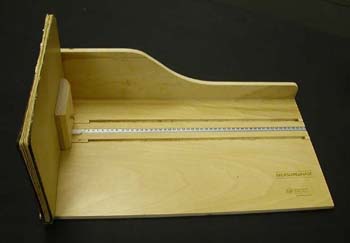 | and then the thickness. |
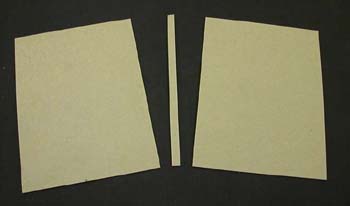
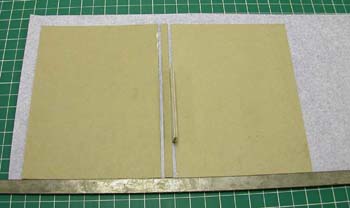
 | The inner enclosure will be made from two pieces of 20 point folder stock. There will be a horizontal piece which wraps horizontally around the width of the book, and a vertical piece which wraps vertically around the length of the book. Cutting will be done with the board shear, though a knife and ruler or straight edge can be used to cut 20-point stock. |
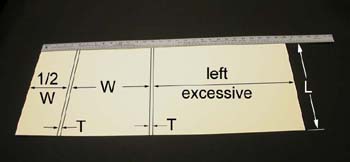 | In the illustration, the shorter dimension is the horizontal piece's finished size, the length of the book. We need to mark the locations of the creases. We are making an enclosure where the flaps close to meet in the center of the book's width, so each front flap will measure 1/2 the book's width. Working left to right in the illustration:
|
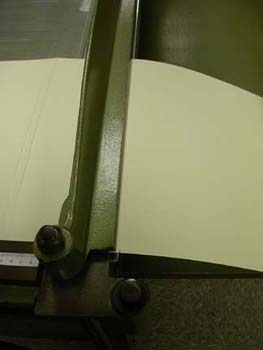
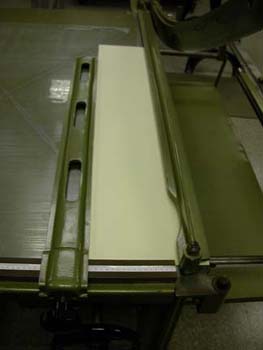
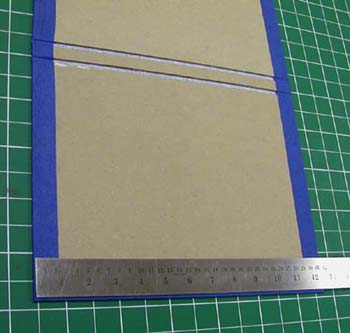
 | Creasing can be done with a bone folder and straight edge, but another very good means of creasing involves using the board shear. The shear has an outer edge with a sharp corner. This edge is the stationary half of the board shear's "scissors." As the angle is 90 degrees, it is not sharp enough to cut the stock but makes a very nice crease. The ruler for the fence is square to this outer edge, so it is easy to make good creases that are perfectly square to the long edges of the stock. Each mark is aligned with the outer corner, the piece is clamped firmly with the hold-down, and the stock is creased against the sharp-cornered outer edge. |
 | The first crease is made, |
 | the second, |
 | the third, |
 | and the fourth. |
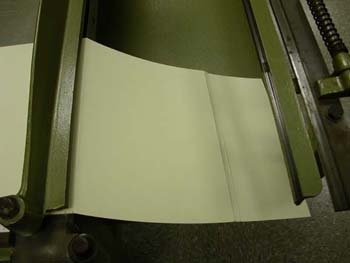
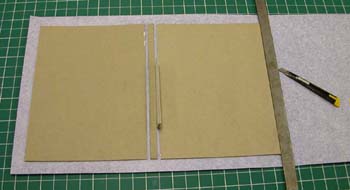
 | We now have a piece that wraps horizontally around the book. Cutting the excessive flap on the right is made easy by marking, rather than measuring: |
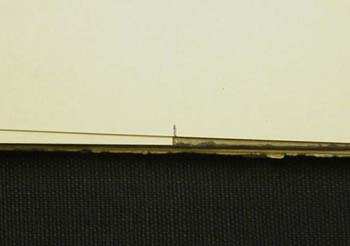 | The short flap on the left is folded over into closed position, covering half the book's width. The long flap is closed on top of the short one, and a mark is made at the edge of the short flap, where the long one needs to be cut off. |
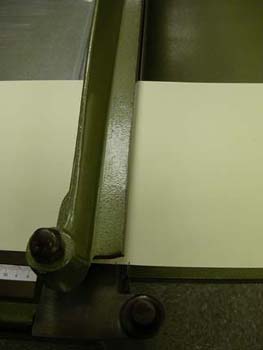
 | The long flap is cut to finished size in the board shear. |
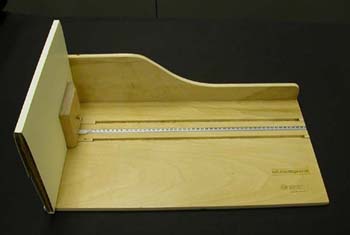
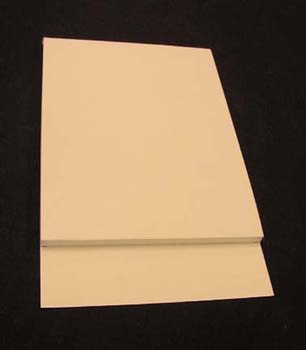
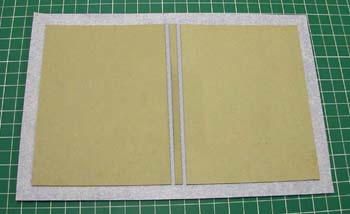
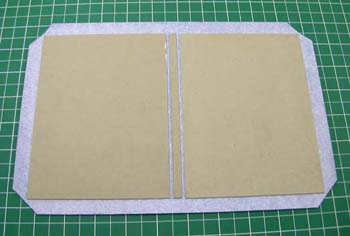
 | Our enclosure, with the book enclosed, now looks like this. |
 | Now we measure the book again, but this time with the inner enclosure, since the vertical piece will wrap around both the book and the horizontal piece. Because the horizontal piece did not change the length, only two measurements need to be taken, the width … |
 | … and the thickness. |
 | The resulting width measurement will be the vertical piece's finished width. It is cut to this measurement as soon as it is determined that the piece of stock is of sufficient length. We will use the following abbreviations to show that the measurements now include the horizontal piece:
|
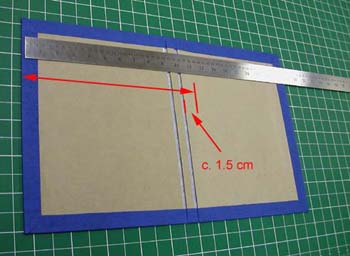
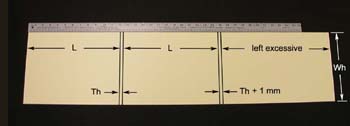 | Now comes marking off the creases of the vertical piece. Working left to right in the illustration:
|
 | The piece is creased using the board shear and a bone folder, as per directions above for the horizontal piece. |
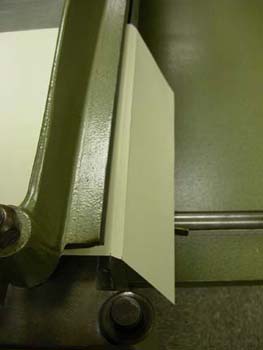
 | We now have a piece that wraps vertically around the book and the horizontal piece, and whose top flap is excessive in length. |
 | It is now a simple matter to mark this flap to finished length and cut it off in the board shear. |
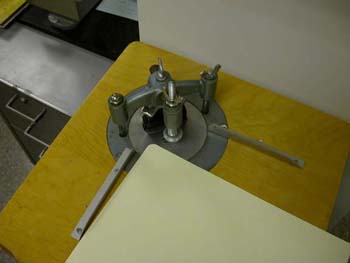 | The corners of both the horizontal and vertical pieces can now be rounded, using the corner rounder. If a corner rounder is not available, this can also be done with a razor knife, using any circular guide such as a coin. |
 | We are ready to assemble the horizontal and vertical pieces into the finished inner enclosure. Adhesive is applied to the back side of the horizontal piece. This can be PVA or double-sided tape (shown). If the item is from a collection that uses security/detection strips, it is at this time and location that the strip is applied. |
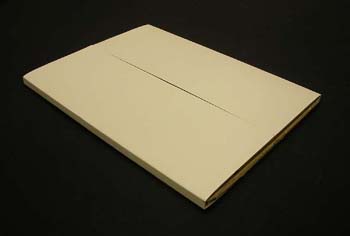
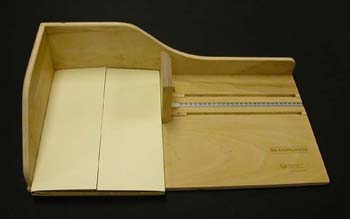
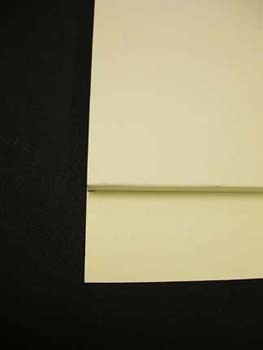
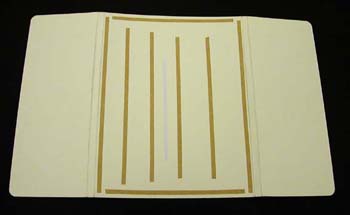
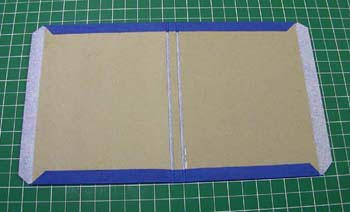
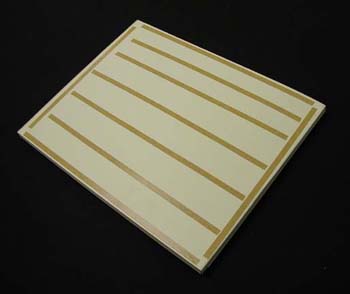
 | The inner enclosure is now finished. Here it is shown in the open state, |
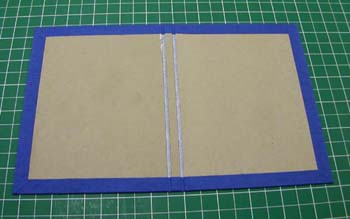
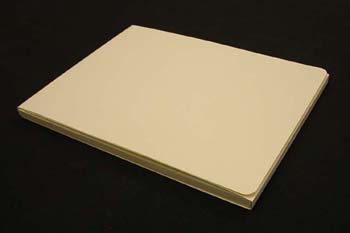 | and here in the closed state. |
 | Now we go back to the MEASUREpHASE one last time, to determine the dimensions of the pieces of board we need for the outer enclosure. We measure the book in the completed inner enclosure, beginning with the length. To this measurement, we add 6 mm, to allow for 3 mm of square at the top and bottom. |
 | Next we measure the width. To this measurement, we add 3 mm, to allow for the square at the fore edge. |
 | For the thickness measurement, the book and inner enclosure are again measured together. The width of the outer enclosure's spine piece will equal this measurement. |
 | The pieces of board for the outer enclosure are cut. |
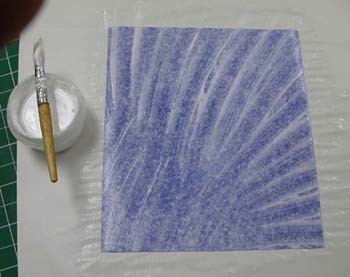
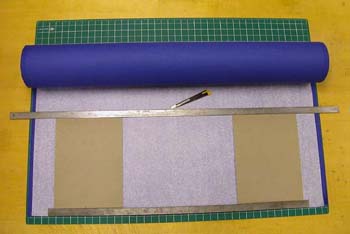 | The cloth that will cover the outer enclosure is cut 5 cm longer than the length of the boards, to allow for a 2.5 cm turn-in at the top and bottom. The width is left excessive. |
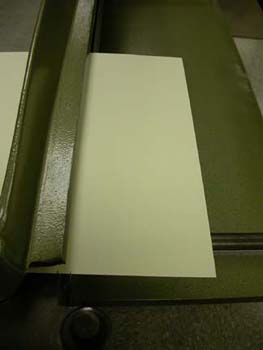
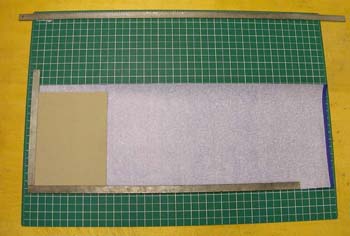 | The selvage is trimmed from one end and the board is situated 2.5 cm from this end and centered lengthwise, 2.5 cm from both the top and bottom. This positioning can be done by marks or, as shown here, by placing two 2.5 cm wide rulers flush with the trimmed end and with the bottom (or top). |
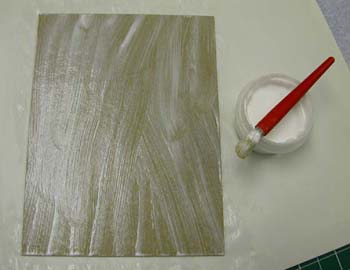 | The boards are now affixed to the cloth. The adhesive is PVA mixture, applied to the boards, not the cloth. |
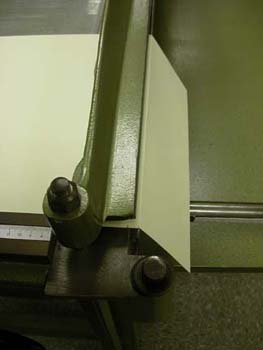
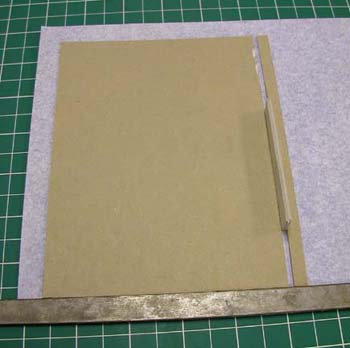 | After the first board has been affixed to the cloth we are ready for the spine piece. The spine piece is glued up (again the board, not the cloth). It is then situated two board thicknesses away from the board by means of a template of that thickness. The bottom edge is aligned flush with that of the board by butting it up to the straight edge. |
 | The other board is glued up and positioned using the same technique and template. |
 | The excess cloth at the end is trimmed to a 2.5 cm turn-in. |
 | The boards are now outlined by a 2.5 cm turn-in on all sides. |
 | Next comes the cutting of the corners to approximately a 45 degree angle. The cuts are made two board thicknesses outside the corners of the boards. |
 | The corners having been cut, we are ready to glue down the turn-ins. The adhesive is PVA mixture, applied to the cloth, not to the board. |
 | We begin with the top and bottom, gathering the cloth a bit toward the center, in order to create a bit of excess at the spine. This will help the cloth make the steps around the edges of the boards and the spine piece and into the hinges. The cloth is worked rigorously into the recesses of the hinges with a bone folder. The cloth at the ends is simply worked down flat over the outer edges of the boards, again using a bone folder. The cloth is then smoothed down in its entirety with the bone folder. |
 | After gluing, the turn-ins at the ends are merely folded over and smoothed down with the bone folder. |
 | We now need to measure for the piece of cloth that will cover the inside of the front board. The width measurement can be fairly rough; measure from the outer edge of the front board to a point about 1.5 cm beyond the inner edge of the back board. |
 | The length measurement needs to be more exact. From the length of the front board, subtract 2 mm. |
 | The cloth is now glued up. The adhesive is PVA mixture. |
 | The cloth is situated 1 mm from the top, bottom, and outer edges of the front board. It is worked rigorously into the recesses of the hinges, using a bone folder. The outer enclosure is now finished. |
 | The back side of the inner enclosure is covered with adhesive, either PVA or double-sided tape (shown). |
 | The inner enclosure is affixed to the inner surface of the back board so that it is bordered at the top, bottom, and fore edge by 3 mm of square. The enclosure is now finished. |
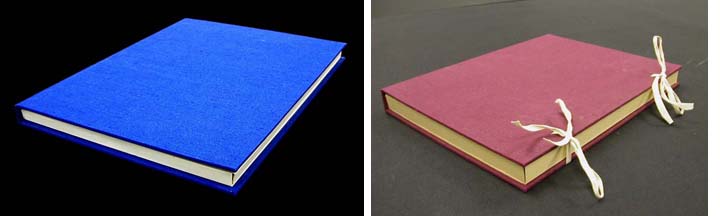
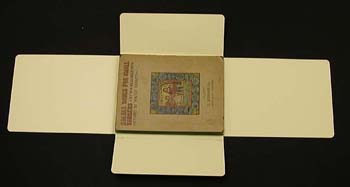
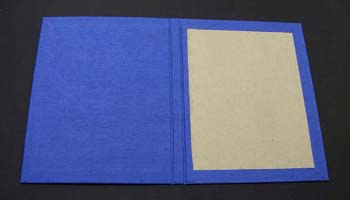
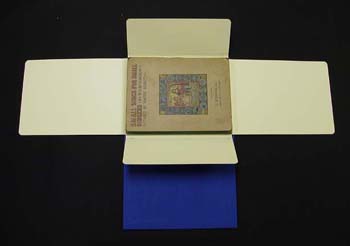 | The finished enclosure is shown here in the open position. |
 | And here it is closed. |
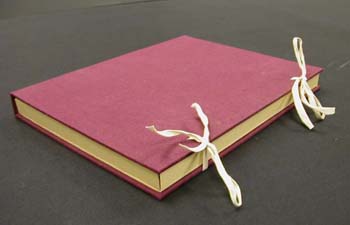 | One twist that can be both decorative and functional is the addition of ties. We will be using linen tape for the ties. |
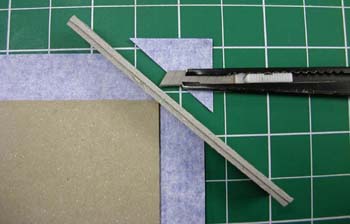
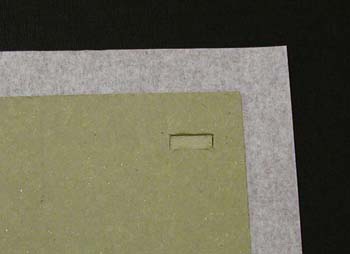
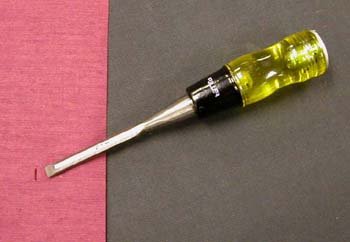
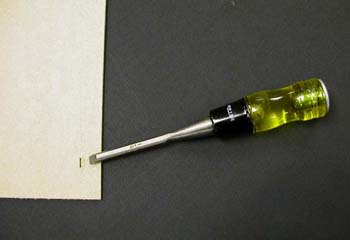 | First, a slit is made at the desired location with a sharp chisel of the appropriate width for the tie material. |
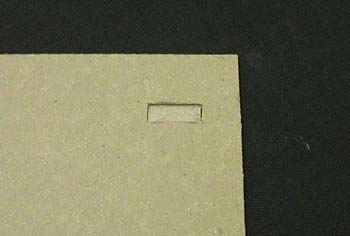 | A trench is dug out on the reverse side of the board. This will be the inner surface of the board. The trench is made about an inch long and deep enough to sink the tape flush. The width is, of course, governed by that of the tape. |
 | The board is now covered. |
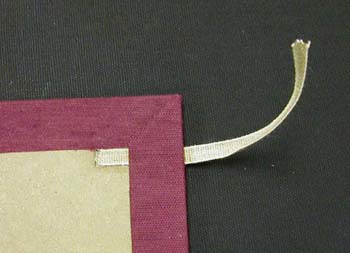
 | The chisel is pierced through from the back side, to locate the slit. |
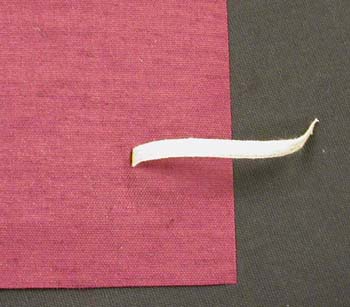 | The tape is threaded through the slit. |
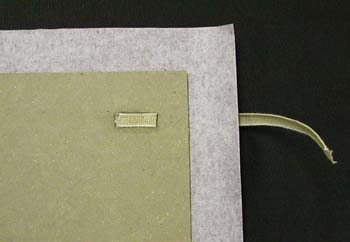 | The tape is glued into the trench using PVA. |
 | The cloth is trimmed at an angle at each corner and the turn-in is completed. |